
Fuel Tank Gauge Unit Check / Fuel Warning Lamp Sensor Check
EL-90spec tableFor removal of Fuel Tank Sender Unit, refer to FE section. Check the resistance between terminals 1 and 2.
Fuel Tank Gauge Unit resistance
1 — 2
Float position (step)3
Float positionFull
Float position (mm)82.4
Resistance value (Ω)Approx. 4 - 6
1 — 2
Float position (step)2
Float position1/2
Float position (mm)29.4
Resistance value (Ω)32 - 34
1 — 2
Float position (step)1
Float positionEmpty
Float position (mm)-21.1
Resistance value (Ω)80 - 83
Fuel Warning Lamp Sensor Check
- 1Place a 12V - 3.4W test lamp from the battery positive terminal to terminal 3, with the Fuel Tank Sender Unit removed (refer to FE section), and a connecting wire from terminal 2 to battery − ve. The test lamp should light after a short delay.
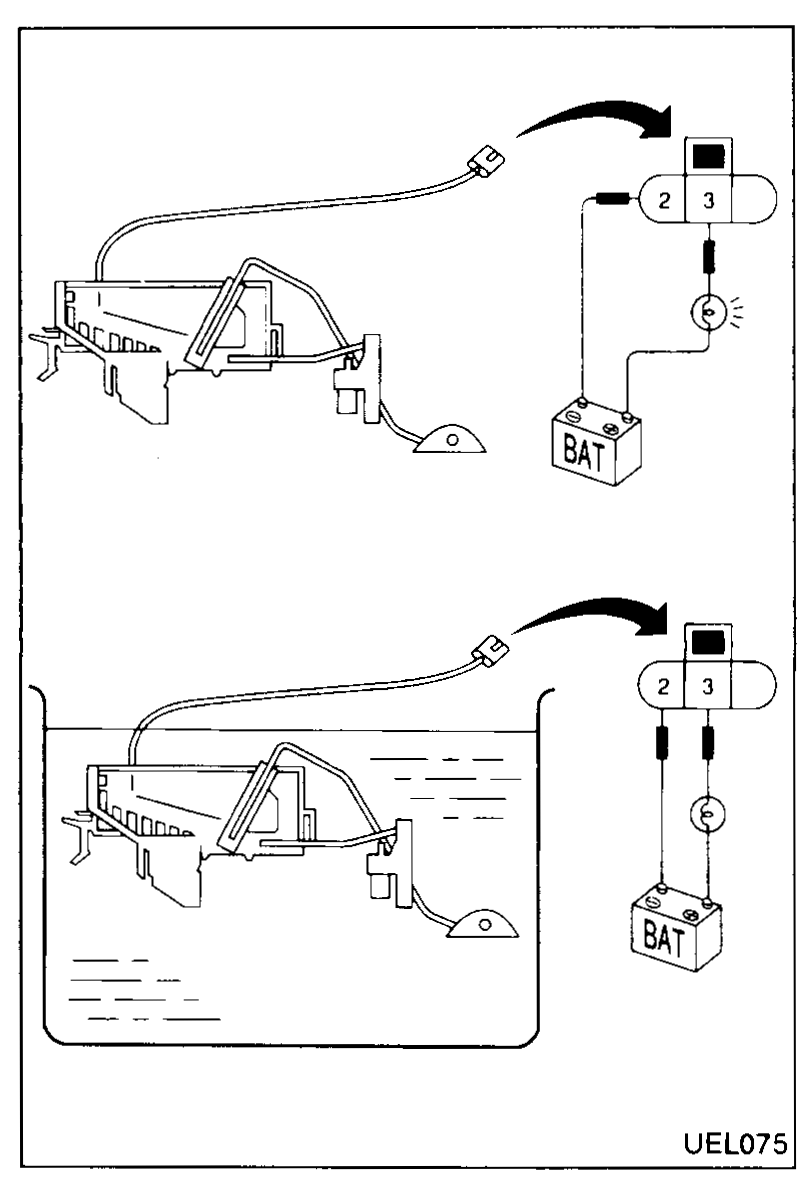 UEL075
 - 2Immerse the fuel tank sender unit so that the fuel low sensor is covered. The test lamp should be extinguished.