
EXTERIOR LAMPS — Driving/Fog Lamp — Bulb Replacement / Replacement / Aiming
EL-66prose procedureAim adjustment: top screw alone = vertical; top + bottom in the same direction = horizontal pan. Unusual but lets a single drive mechanism do both axes.
Driving/Fog Lamp — Bulb Replacement
- 1Remove battery negative cable from battery.
- 2Remove Driving/Fog Lamp finisher by unscrewing captive screw.
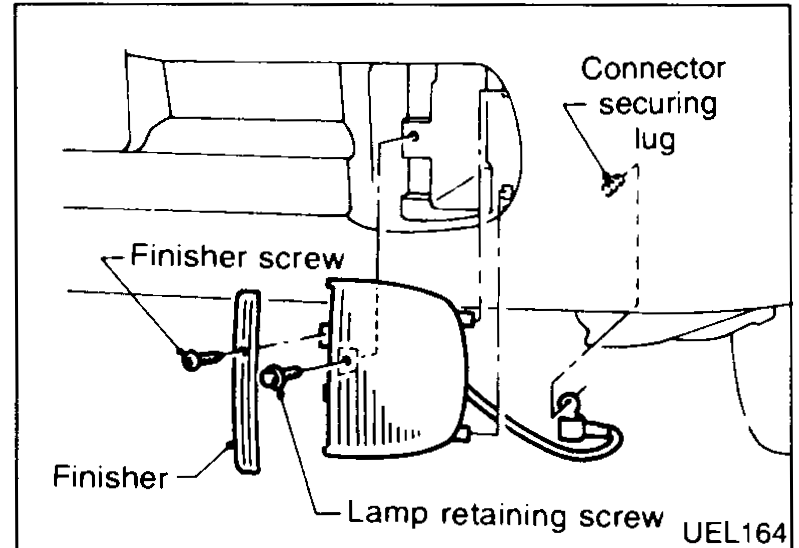 UEL164
 - 3Unscrew lamp from bumper.
- 4Twist lamp out of bumper.
- 5Twist and pull out sealing cap from back of unit.
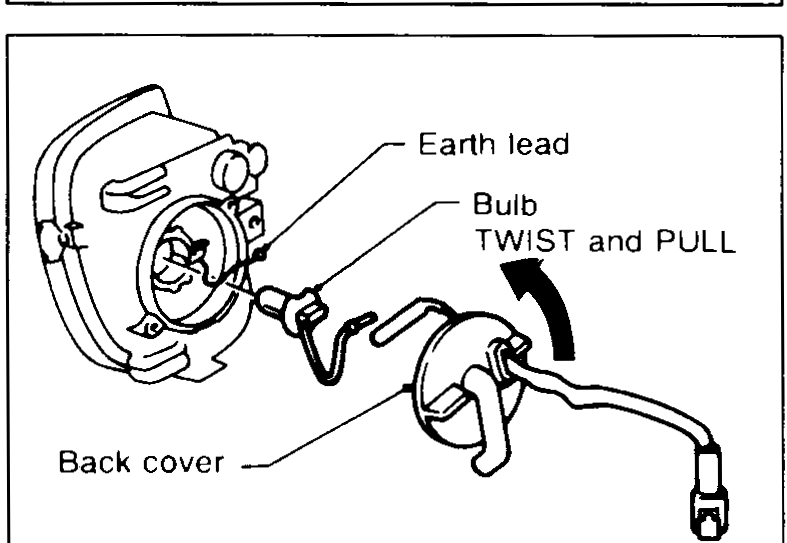 UEL165
 - 6Release bulb securing clip.
- 7Disconnect defective bulb and replace.
- Bulb: H4 12V 55W
CAUTION
• Do not touch bulb directly.
• When re-fitting sealing cap on back of lamp, ensure it is in correct orientation to prevent water ingress.
Driving/Fog Lamp — Replacement
- 1Remove battery negative cable from battery.
- 2Remove Driving/Fog Lamp finisher by unscrewing captive screw.
- 3Unscrew lamp from bumper.
- 4Twist lamp out of bumper.
- 5Remove connector from bumper stud.
- 6Disconnect lamp from harness and remove.
CAUTION
• Refit new unit in reverse order to the above.
• Do not stick items onto lens.
• Do not allow plastic areas of lamp to come into contact with chemicals.
Driving/Fog Lamp — Aiming
- 1Remove Driving/Fog Lamp finisher by unscrewing captive screw.
- 2Adjust vertical aim by turning the top aiming screw.
 UEL166
 - 3Adjust horizontal aim by turning both the top and bottom aiming screws in the same direction.
CAUTION
When aiming the lamp do not cover any part of the lens.