
WIPERS AND WASHERS — FRONT WIPERS
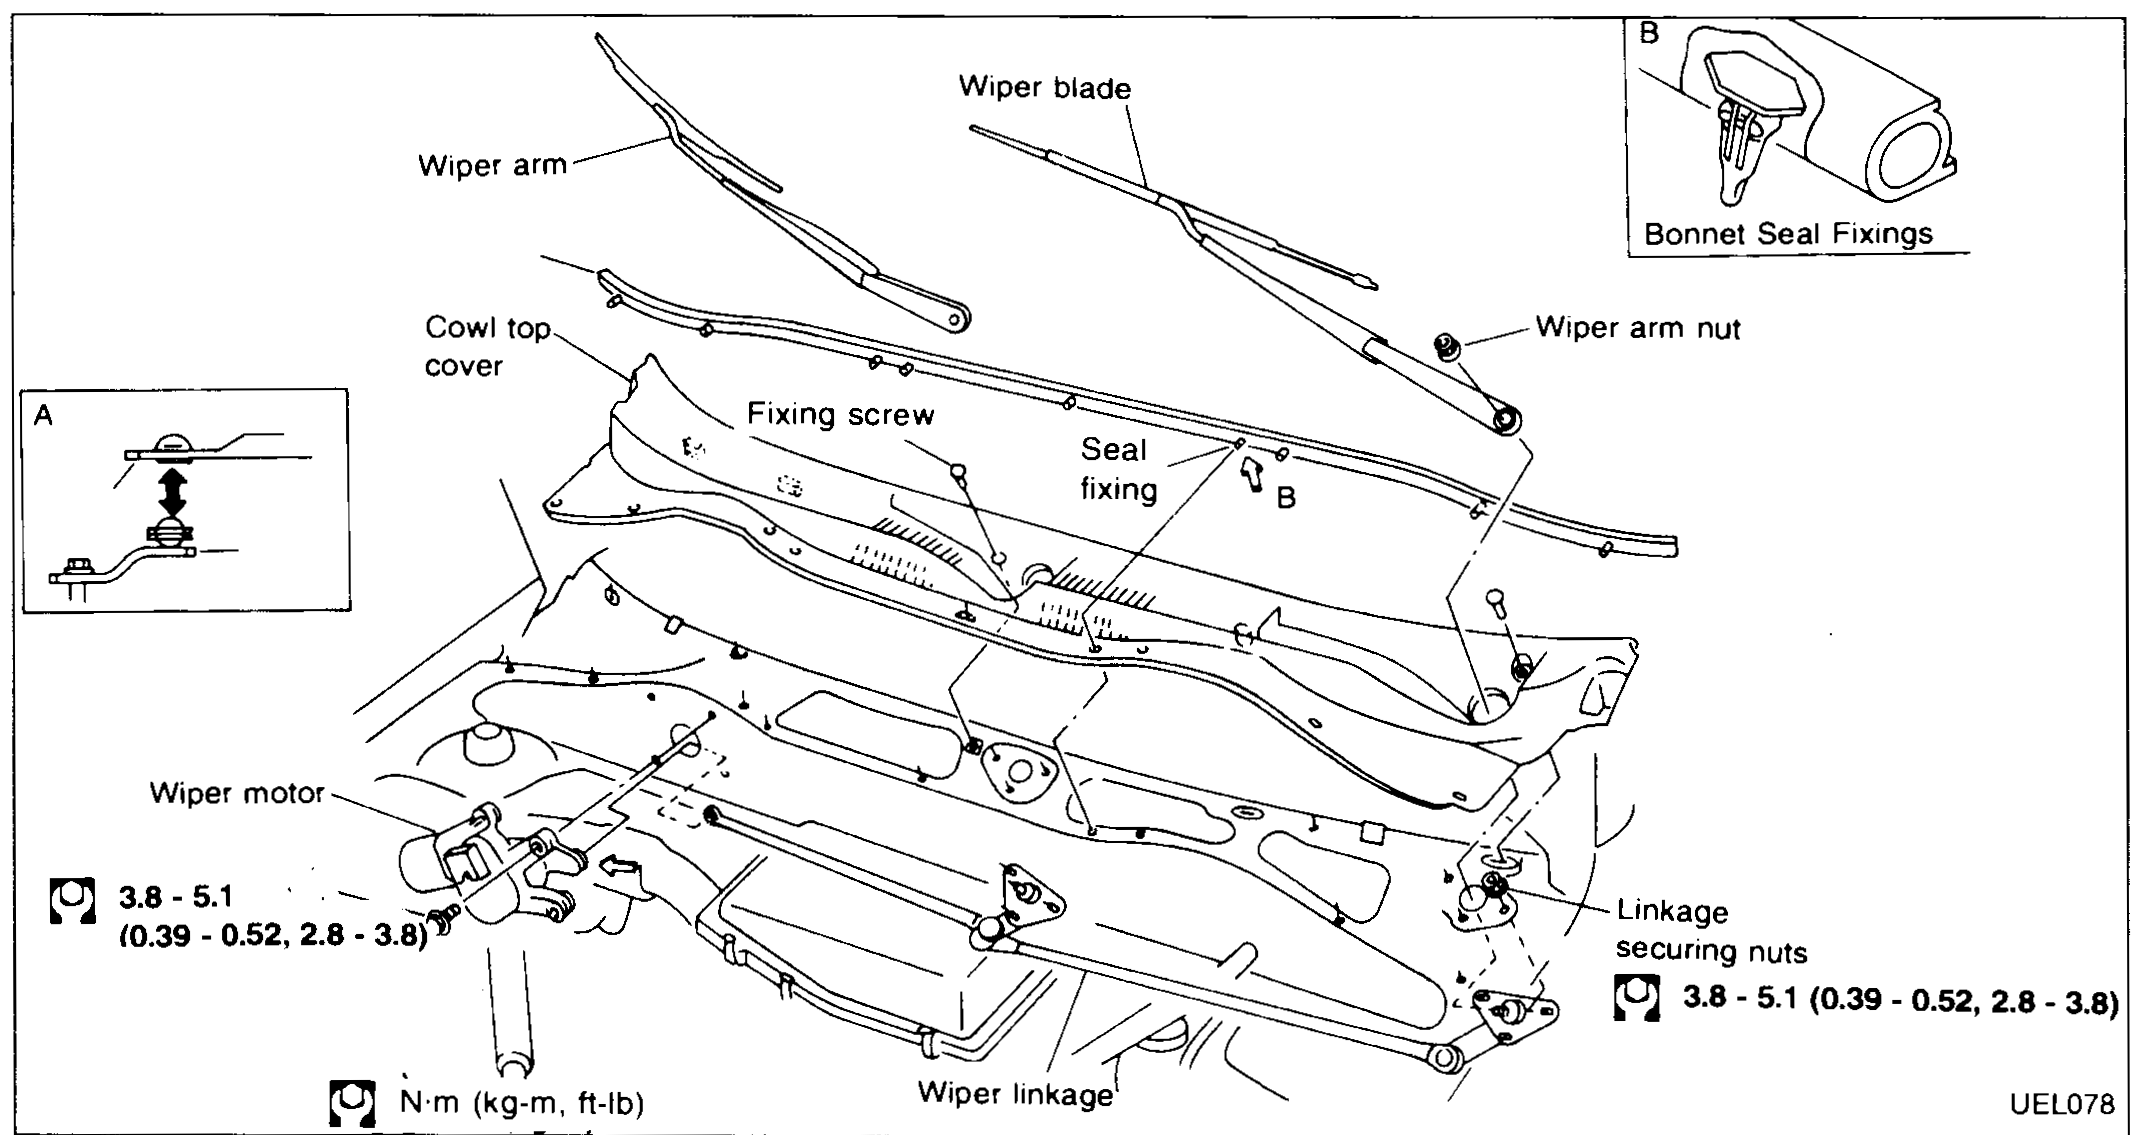
EL-104prose procedureExploded view shown is for LHD vehicles; RHD vehicles have components fitted with the opposite orientation.
FRONT WIPERS — Removal
| Specification | Value |
|---|---|
| Wiper motor / linkage securing nuts | ≈37 - 50N·m |
| Wiper arm nut | ≈167 - 226N·m |
Wiper motor / linkage securing nuts
37 - 50N·m
Wiper arm nut
167 - 226N·m
The above illustration shows an exploded view of the front windscreen wiper assembly for LHD vehicles; RHD vehicles have components fitted with the opposite orientation.
NOTE
Before removing wiper arms, ensure the wiper blades are in the park position.
FRONT WIPERS — Removal
- 1Lift plastic nut covers on wiper arms.
 UEL078
 - 2Remove wiper arm securing nuts and prise off wiper arms.
Installation
FRONT WIPERS — Installation
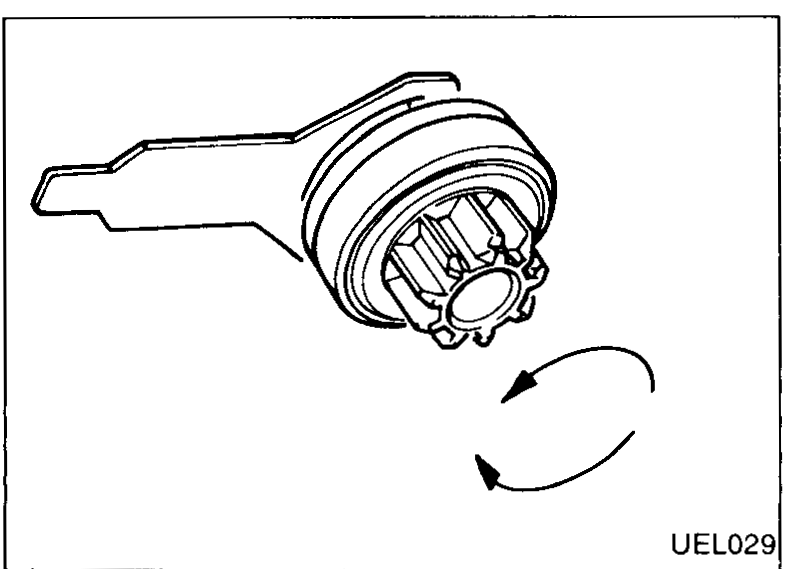
- 1Before replacing wiper arms, clean up the pivot splines with a stiff brush to reduce the possibility of wiper arm looseness.
 UEL029
 - 2Prior to wiper arm installation, turn on wiper switch to operate wiper motor and then turn it "OFF" (Auto Stop).
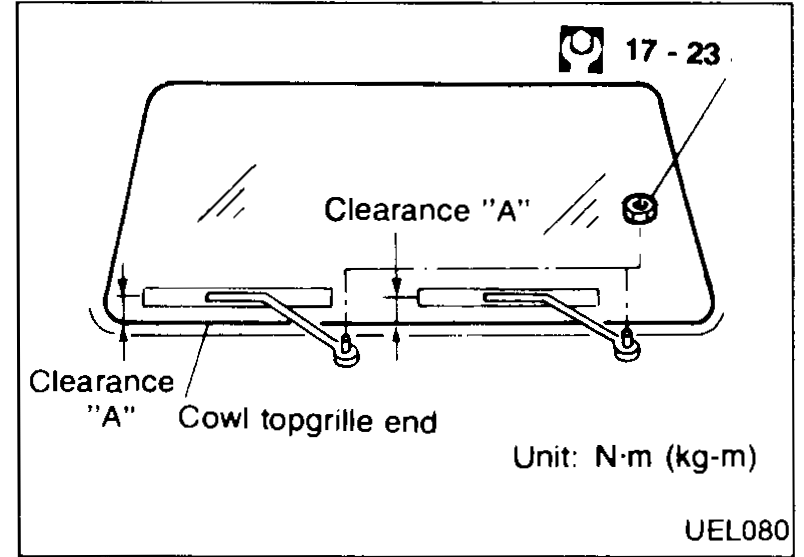
- 3Lift the blade up and then set it down onto surface of windscreen to set the blade center to clearance "A" immediately before tightening nut to torque figure indicated in illustration.
 UEL080
 - 4Eject washer fluid. Turn on wiper switch to operate wiper motor and then turn it "OFF".
- 5Ensure that wiper blades stop within clearance "A".Clearance "A": 17.5 - 32.5 mm (0.7 - 1.3 in).
- 6Ensure that the wiper operates smoothly at all speeds and without judder or "screeching" when the screen is wet, and that all fluid is removed from the screen in one sweep of the wiper.
| Specification | Value |
|---|---|
| Clearance "A"blade stop position from cowl topgrille end | 17.5 - 32.5mm (0.7 - 1.3 in) |
Clearance "A"blade stop position from cowl topgrille end
17.5 - 32.5mm (0.7 - 1.3 in)