
CYLINDER HEAD — Installation (Cont'd)
EM-7019prose procedureInstallation (Cont'd)
Installation (continued)
- 7Install camshaft and camshaft brackets.Tighten in numerical order.
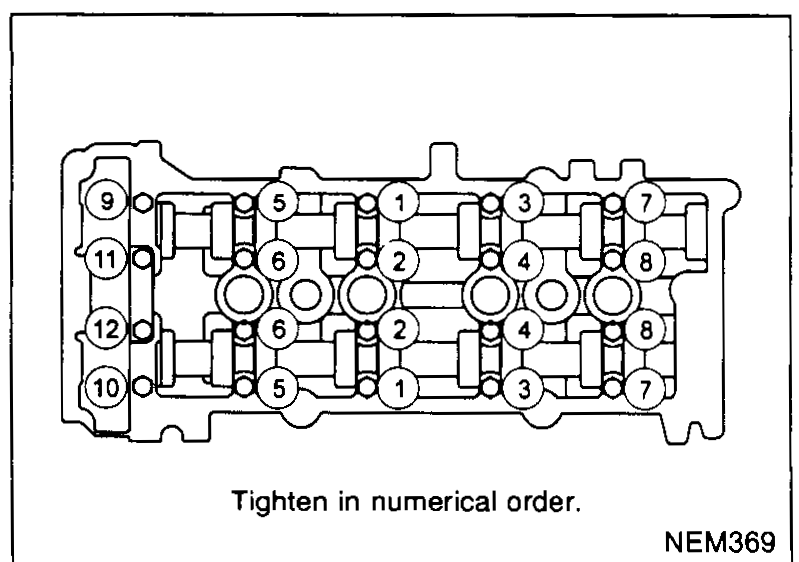 NEM369
IMPORTANT
Tighten camshaft bracket bolts gradually in three stages:
(a) 2 N·m (0.2 kg-m, 1.4 ft-lb)
(b) 6 N·m (0.6 kg-m, 4.3 ft-lb)
(c) 9 - 11.8 N·m (0.92 - 1.20 kg-m, 6.7 - 8.7 ft-lb)
NOTE
If any part of valve assembly or camshaft is replaced, check valve clearance according to the reference data. After completing assembly, check valve clearance. Refer to "Checking" and "Adjusting" in "VALVE CLEARANCE".
| Specification | Value |
|---|---|
| Reference data — initial setting of valve clearance — IntakeCold | 0.30mm (0.012 in) |
| Reference data — initial setting of valve clearance — ExhaustCold | 0.35mm (0.014 in) |
Reference data — initial setting of valve clearance — IntakeCold
0.30mm (0.012 in)
Reference data — initial setting of valve clearance — ExhaustCold
0.35mm (0.014 in)
Installation (continued)
- 8Assemble camshaft sprocket with chain.Set timing chain by aligning mating marks with those of camshaft sprockets.Make sure sprocket's mating marks face engine front.
 NEM047
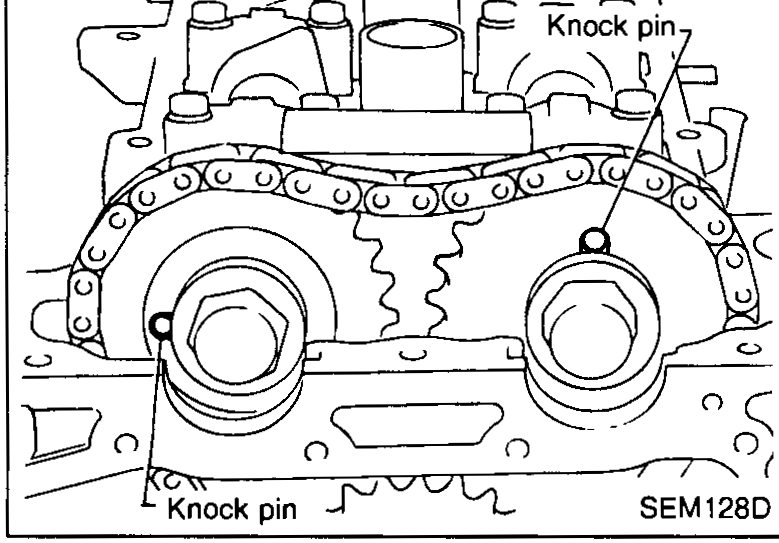
 - 9Install camshaft sprocket bolts.Make sure camshafts are aligned as shown in figure.
 SEM128D
See also
VALVE CLEARANCE — Checking · VALVE CLEARANCE — Adjusting