
OIL PAN — Removal / Installation
EM-14prose procedureStep 4 reads "Remover front exhaust tube" verbatim — apparent OCR/typo in source for "Remove".
Removal
Oil pan removal
- 1Remove splashguards for access to oil pan area.
- 2Drain engine oil.
- 3Remove center member.
- 4Remover front exhaust tube.
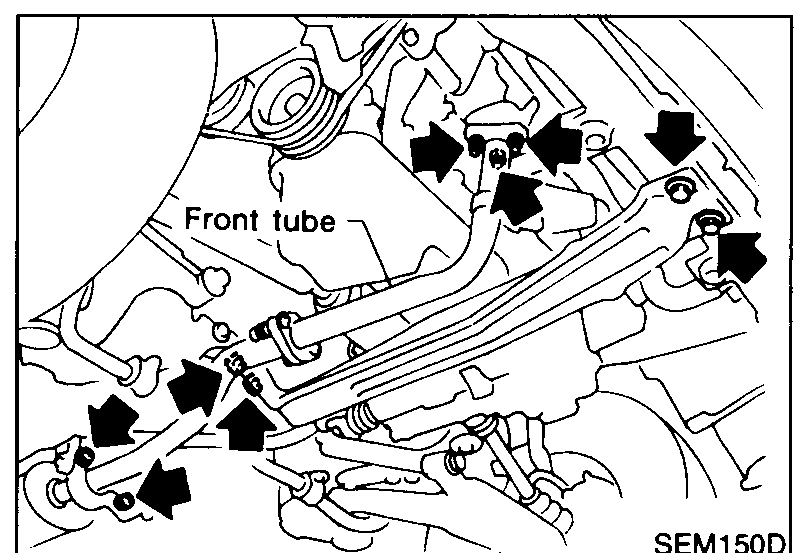 SEM150D
 - 5Remove oil pan bolts. (1) Insert Tool between cylinder block and oil pan. (2) Slide Tool by tapping its side with a hammer, and remove oil pan.Be careful not to damage aluminum mating surface.Do not insert screwdriver, or oil pan flange will be deformed.
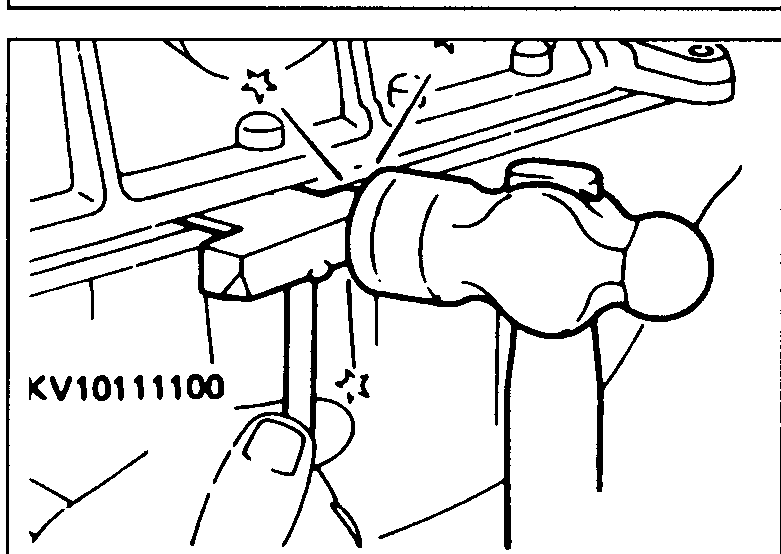 SEM883A
Installation
Oil pan installation
- 1Before installing oil pan, remove all traces of liquid gasket from mating surfaces using a scraper. Also remove traces of liquid gasket from mating surface of cylinder block.
- 2Fit new seals as shown. Ensure correct length, front & rear: Length "ℓ": Front seal 134 mm (5.28 in), Rear seal 123 mm (4.84 in).
 UEM038
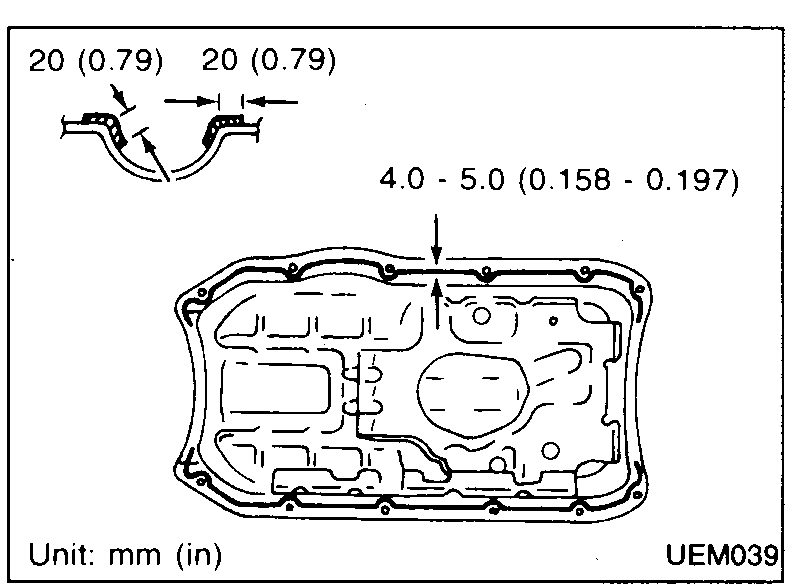
 - 3Apply a continuous bead of liquid gasket to mating surface of oil pan as shown. Use Genuine Liquid Gasket or equivalent.
 UEM039
| Specification | Value |
|---|---|
| Oil pan front seal length "ℓ"Front seal | 134 (5.28)mm (in) |
| Oil pan rear seal length "ℓ"Rear seal | 123 (4.84)mm (in) |
| Liquid gasket bead diameter (oil pan mating surface)Apply continuous bead | 4.0 - 5.0 (0.158 - 0.197)mm (in) |
| Liquid gasket end offset at seal joinFrom seal at each end | 20 (0.79)mm (in) |
Oil pan front seal length "ℓ"Front seal
134 (5.28)mm (in)
Oil pan rear seal length "ℓ"Rear seal
123 (4.84)mm (in)
Liquid gasket bead diameter (oil pan mating surface)Apply continuous bead
4.0 - 5.0 (0.158 - 0.197)mm (in)
Liquid gasket end offset at seal joinFrom seal at each end
20 (0.79)mm (in)