
TIMING CHAIN — Installation
EM-20prose procedureInstallation
Timing chain installation
- 1Confirm that No. 1 piston is set at T.D.C. on its compression stroke.
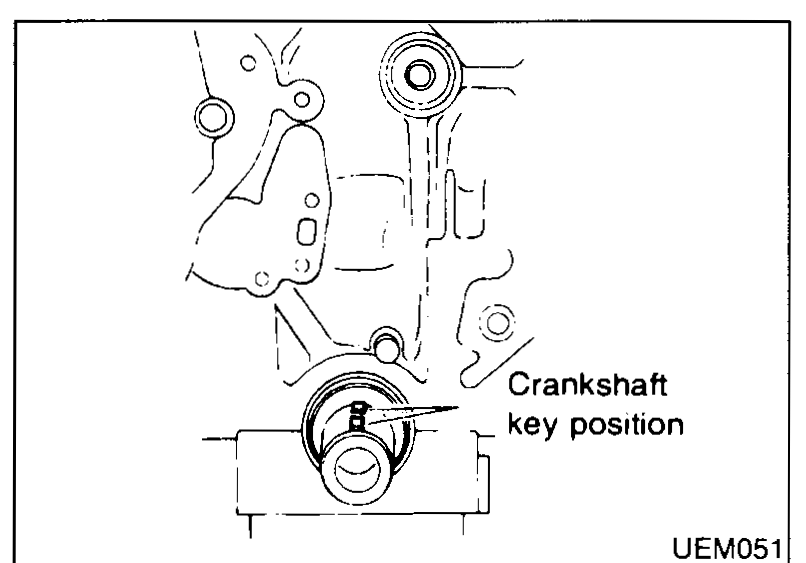 UEM051
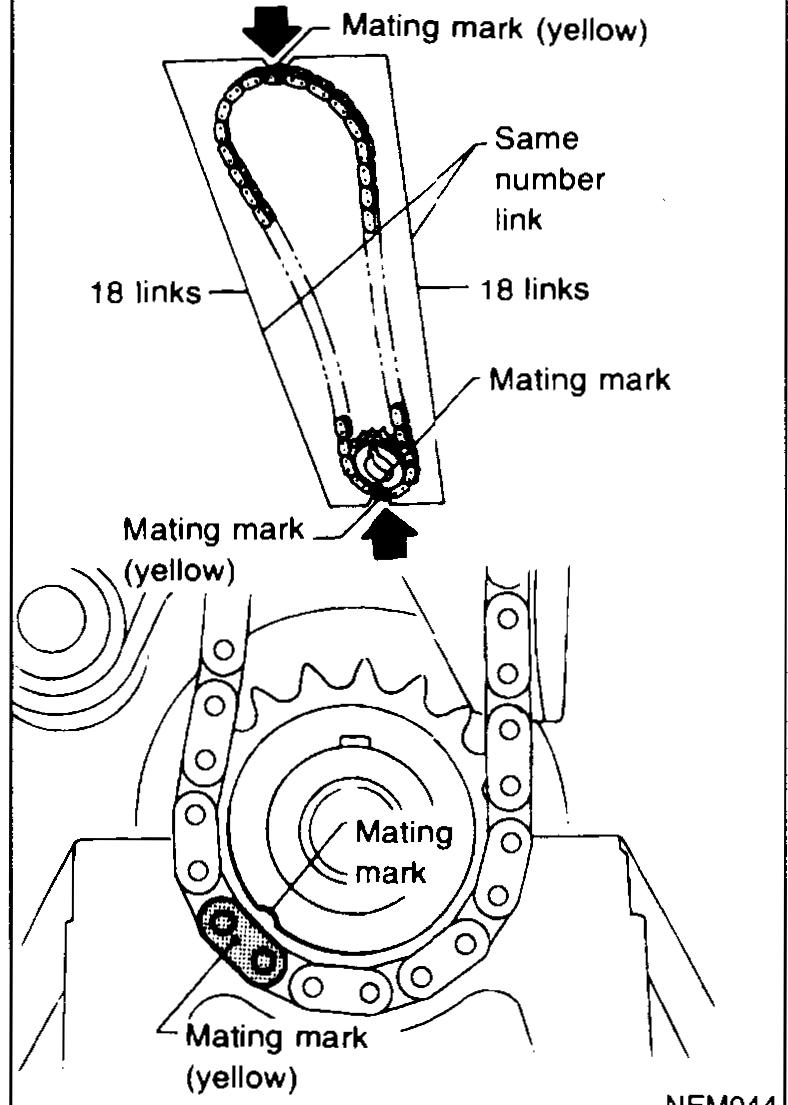
 - 2Install crankshaft sprocket and lower timing chain. Set timing chain by aligning its mating mark with the one on crankshaft sprocket.Make sure sprocket's mating mark faces engine front.The number of links between the alignment marks (yellow) are the same for the left and right sides, so either side can be used during alignment with the sprocket.
 NEM044
 - 3Fit the lower chain tensioner.
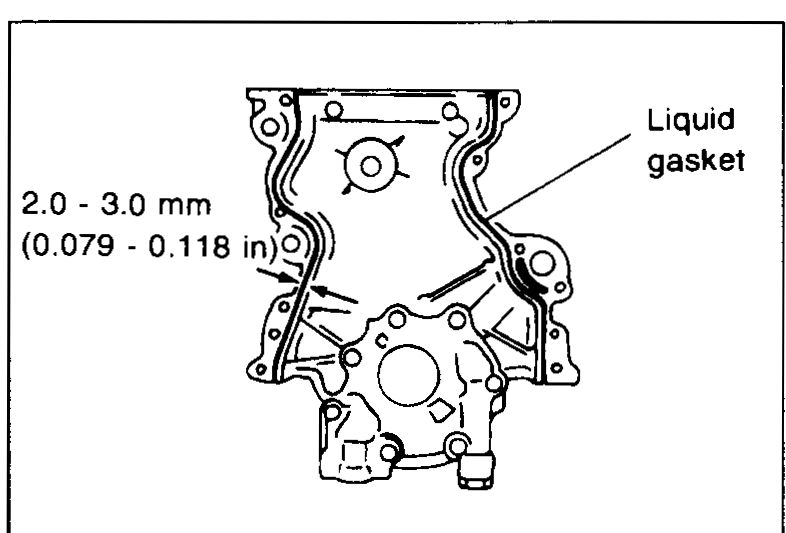
- 4Apply liquid gasket to front cover. Bead 2.0 - 3.0 mm (0.079 - 0.118 in) wide.Before installing front cover remove all traces of old liquid gasket.
 UEM052
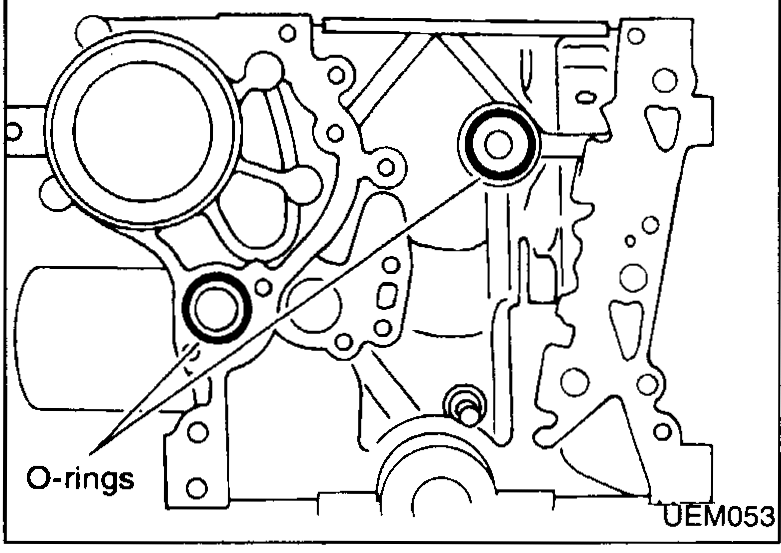
 - 5Install front cover.Check alignment of mating marks on chain and crankshaft sprocket.Align oil drive spacer with oil pump.Ensure O-rings are fitted correctly.Be careful not to damage oil seal when installing front cover.
 UEM053
 - 6Install engine front mounting.
- 7Install oil strainer.
- 8Install oil pan. Refer to "Installation" in "OIL PAN".
- 9Install crankshaft pulley.
- 10Install center member.
| Specification | Value |
|---|---|
| Front cover liquid-gasket bead widthContinuous bead on front cover mating face | 2.0 - 3.0 (0.079 - 0.118)mm (in) |
| Lower timing chain link count between yellow marksSame number of links on both sides — either side can be used for alignment | 18links (each side) |
Front cover liquid-gasket bead widthContinuous bead on front cover mating face
2.0 - 3.0 (0.079 - 0.118)mm (in)
Lower timing chain link count between yellow marksSame number of links on both sides — either side can be used for alignment
18links (each side)
See also
OIL PAN