
REPAIR FOR COMPONENT PARTS — Mainshaft and Gears (Cont'd)
MT-5020prose procedureMainshaft and Gears (Cont'd)
Synchronizer assembly (continued)
- 4Use a punch to press the ball seat and insert the finger.
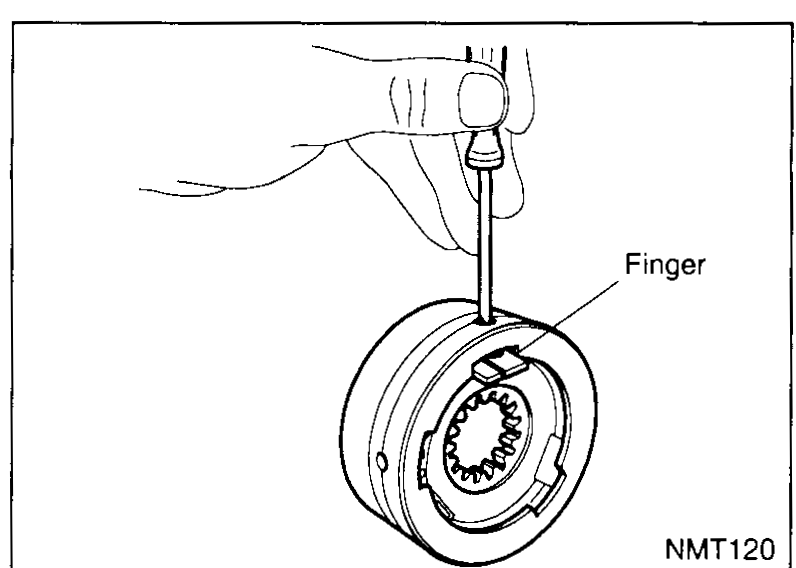 NMT120
 - 5Insert the ball and press it with the punch.
 NMT121
 - 6Rotate the hub until the second notch B aligns with hole no. 2 of the tool.
- 7Repeat procedure for assembling the other springs, ball seats, fingers and balls.
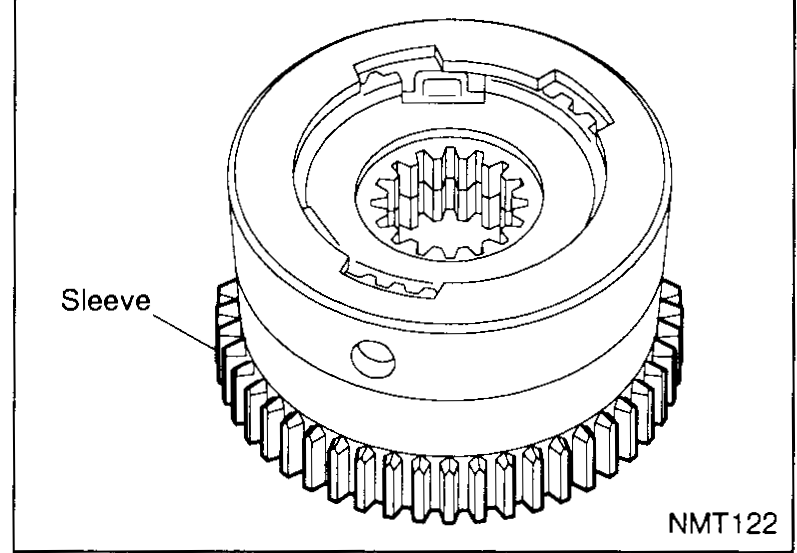
- 8Insert the sleeve into the tool.Check hub and sleeve orientation, pay attention to the direction and the marks made on disassembly.
 NMT122
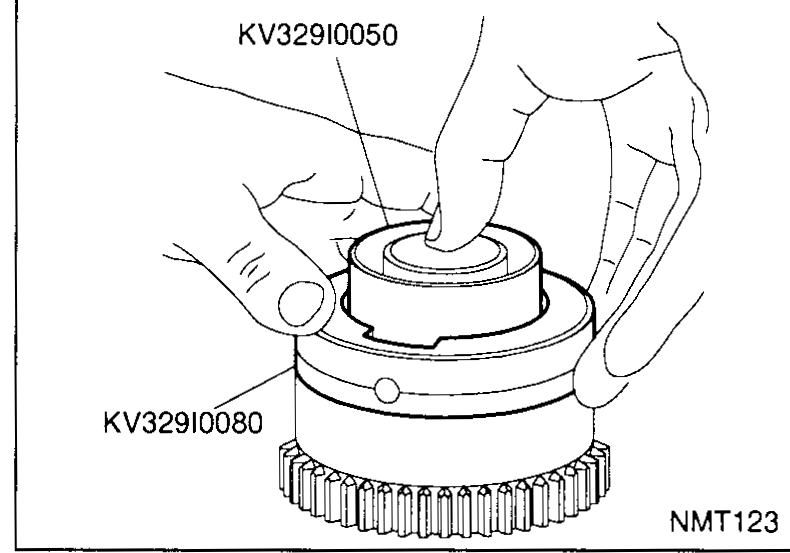
 - 9Holding the tool on the sleeve, insert the hub into the sleeve using KV32910050.
 NMT123
 - 10Remove the tools.
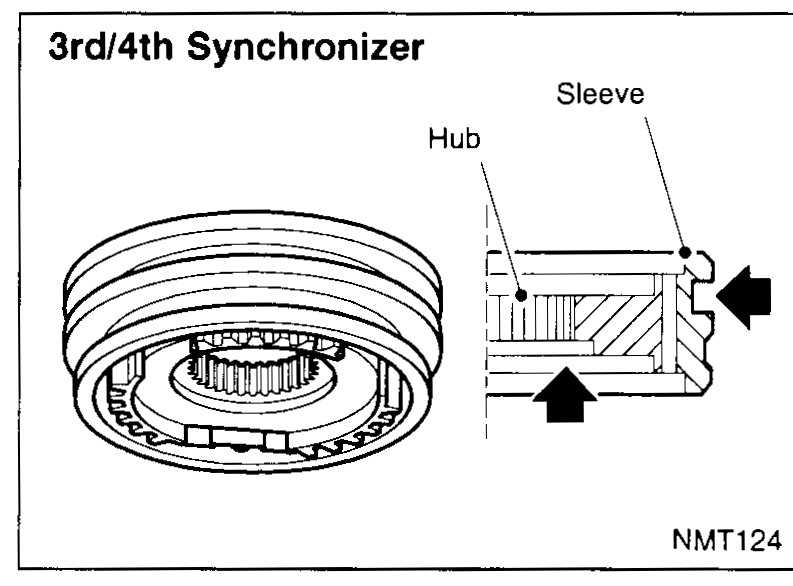
- 11Assemble the 3rd/4th synchronizer hub and sleeve.Check hub and sleeve orientation, pay attention to the direction and the marks made on disassembly.
 NMT124