
MASTER CYLINDER
BR-11prose procedureDisassembly (Cont'd)
- 2Remove piston assemblies. If it is difficult to remove secondary piston assembly, gradually apply compressed air through fluid outlet.
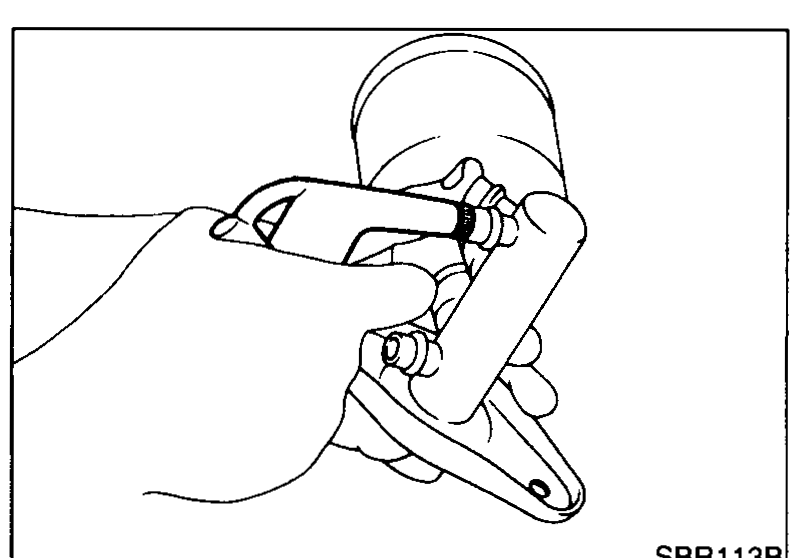 SBR113B
 - 3Draw out reservoir tank.
WARNING
Wear eye protection and protective clothing.
Inspection
NOTE
Check for the following items.
CAUTION
Replace any part if damaged.
NOTE
Master cylinder: Pin holes or scratches on inner wall.
Piston: Deformation of or scratches on piston cups.
Stopper cap: Damage or excessive deformation of claws.
Rubber seals: Slits, damage on seal surface.
Assembly
- 1Insert secondary piston assembly. Then insert primary piston assembly.
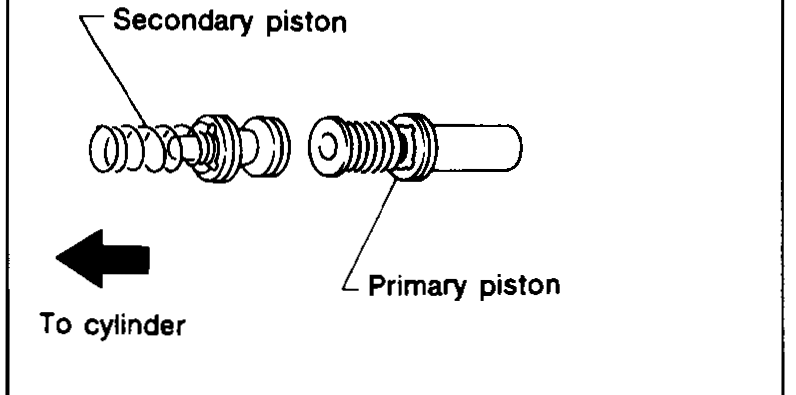 SBR114B
 - 2Install new stopper cap.
- 3Install master cylinder seal.
- 4Install reservoir tank oil seals.
- 5Push reservoir tank into master cylinder.
CAUTION
Pay attention to direction of piston cups in figure at left. Also, insert pistons squarely to avoid scratches on cylinder bore.
Installation
CAUTION
Refill with new brake fluid "DOT 4".
Never reuse drained brake fluid.
- 1Place master cylinder and filter bracket onto brake booster and secure mounting nuts lightly.
- 2Fit flare nuts to master cylinder.
- 3Tighten mounting nuts.
- 4Tighten flare nuts.
- specSpecification: 15 - 18 N·m (dry) (1.5 - 1.8 kg-m, 11 - 13 ft-lb)
- 5Bleed air. Refer to "Bleeding Procedure" in "AIR BLEEDING".
- 6Connect low fluid warning light harness.
- 7Refit air cleaner.
| Specification | Value |
|---|---|
| Flare nut tightening torque (dry) | ≈147 - 177N·m |
Flare nut tightening torque (dry)
147 - 177N·m
See also
AIR BLEEDING