
DISCHARGING, EVACUATING, CHARGING AND CHECKING — Inspection for Refrigerant Leaks (Cont'd) / Removal of Service Tools
HA-22prose procedureInspection for Refrigerant Leaks (Cont'd)
IMPORTANT
To prevent detecting errors, make sure that there is no refrigerant vapor or tobacco smoke in the vehicle vicinity. It is also necessary to shield vehicle from wind so that leaking refrigerant is not blown away.
INSPECTION POINTS
Check carefully each tube joint. To check, wipe the portion to be checked with waste cloth, and move tester probe all around the joint.
Compressor
Check shaft seals and bolt holes, and also around magnet clutch.
Liquid tank
Check pressure valve, safety valve and fusible plug mounts.
Service valve
Check all around service valves. Ensure that valve core is not loose. Service valve caps, must be attached to valves (to prevent leak). Also check that there are no foreign objects inside caps.
Inside of cooling unit
To check, insert leak tester probe into drain hose immediately after stopping engine. (Keep probe inserted for more than 10 seconds.)
Removal of service tools
- 1Completely loosen adapter valves of low pressure and high pressure lines.
 RHA607B
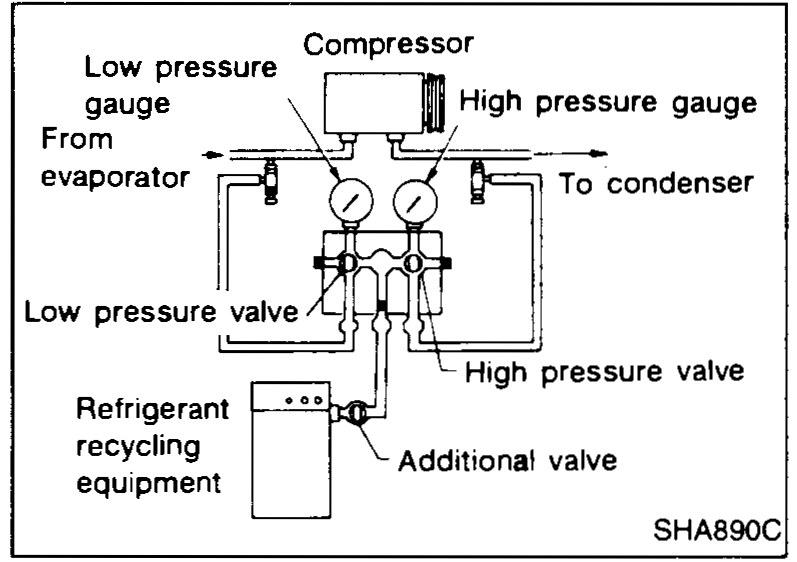
 - 2Close additional valve and remove center hose from charging cylinder.
 SHA890C
 - 3Connect center hose to refrigerant recycling equipment.
- 4Open additional valve and both valves on gauge manifold.
- 5Capture refrigerant in charging system.
- 6After recovering regrigerant, remove adapter valves from on-car service valves.