Nissan Micra K11 silhouetteK11

FRONT SUSPENSION — Stabilizer Bar (Removal and Installation)

FA-21prose procedure

"Type B" bushes have orientation flanges that must face the stabilizer bar and transverse link.

Removal and Installation

Stabilizer bar removal and installation

  1. 1
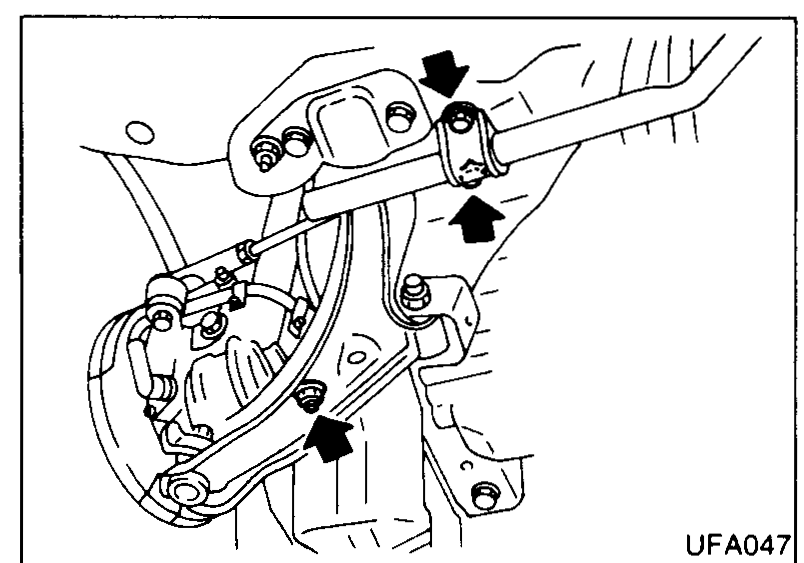
    Remove stabilizer bar.
    Photo of the front stabilizer-bar mounting area with three arrows pointing at the stabilizer-bar clamp bolts and the connecting-link nut to be removed.
    UFA047
  2. 2
    When installing stabilizer, make sure that paint mark and clamp face in their correct directions. Paint marks must be inboard of clamps.
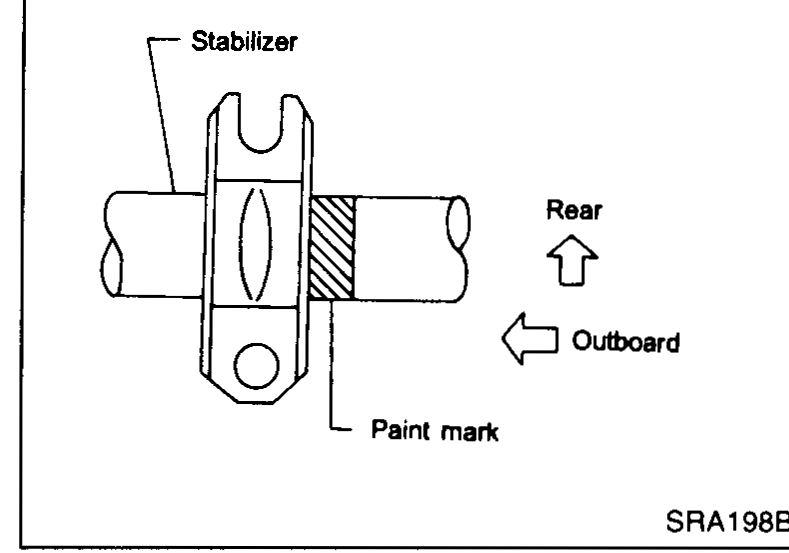
    Detail of the stabilizer bar end with the clamp and its paint mark. Callouts: 'Stabilizer' (the bar), 'Paint mark' (hatched section on the bar near the clamp), 'Rear' (arrow up), 'Outboard' (arrow left). Indicates the orientation: paint marks must face inboard.
    SRA198B
  3. 3
    Ensure that the bar/link/bushes are correctly assembled, as shown.
    Exploded vertical view of the stabilizer connecting-link components. Callouts: 'Bush', 'Stabilizer bar', 'Transverse link'. Shows the stacking order of bushes through the connecting rod between the stabilizer bar and the transverse link.
    UFA051
  4. 4
    Ensure that "Type B" bushes are fitted correctly. The location flanges must fit towards the stabilizer bar and transverse link.

Search Manual

Search pages, specs, and procedures